¶ Why do I need a server to mod Stickforge?
Stickforge is a multiplayer game, and all the resources (maps, skins, items, etc.) are hosted on the game server you connect to. That’s what makes the game fully moddable. To create a mod or modify an existing one, you need to have a server running on your computer (a local server), so you can test what you're creating and see if it works well before sharing it with the community.
For example: you're creating a new sword and want to test it on your computer, in-game, before sharing it. Are the damage values balanced? Is the skin displayed properly? And so on.
Once your mod is ready, you'll be able to upload it to the Steam Workshop to share it with other players who have their own dedicated servers hosted online. If you don't want to share it publicly, you can manually host it on your own online dedicated server by uploading your mod to the server’s mods directory (not covered in this tutorial).
Let's start with the requirements.
¶ Requirements to install a local dedicated server on your computer
You need to to have :
- Windows 10/11 (also work with Linux but not covered in this tutorial)
- Steam client installed
- Stickforge in your Steam library, and installed
- About 1Go free disk space
- At least 4GB of RAM on your computer, 8 preferred
¶ Installation of the local dedicated server
Launch Steam, go to your library and search “Stickforge”. You should see this :
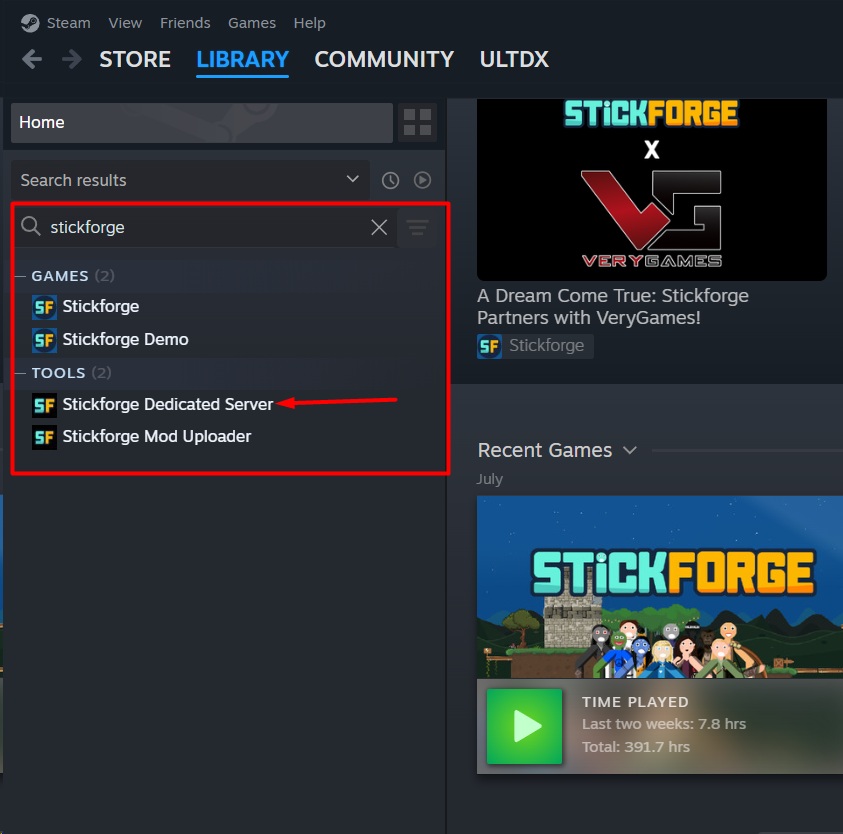
Click on “Stickforge Dedicated Server” and install it. Once it's done, the local dedicated server of Stickforge is installed!
Run the local server
Now we are going to test if it works. Click on “Launch” green button
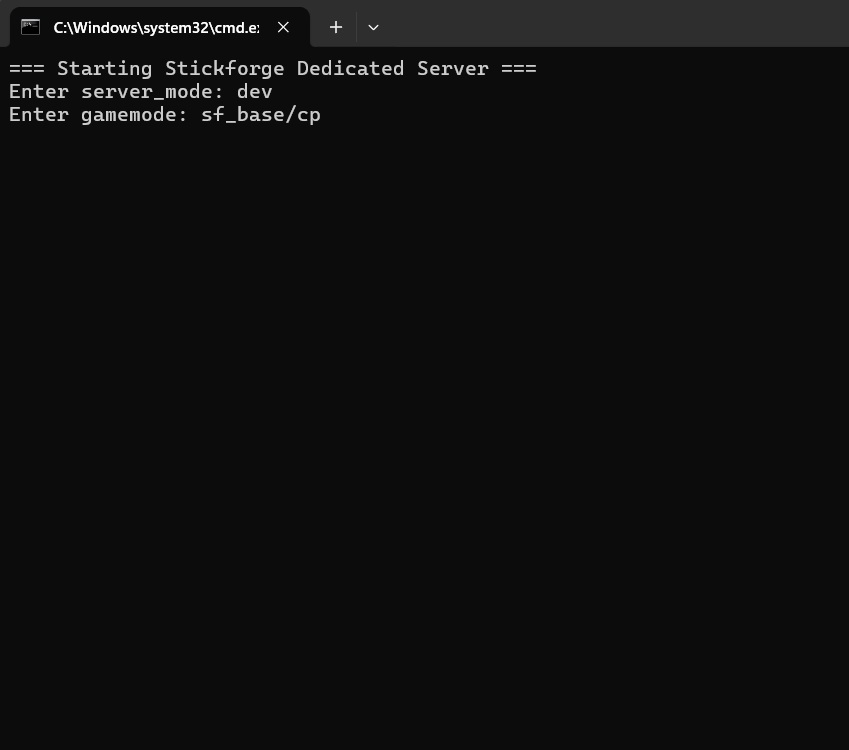
- A terminal window should appear and will ask you for the server_mode.
Writedevthen press enter. - Next, it should ask you which gamemode you would like.
For testing purposes write:sf_base/cp(which is Conquer Points mode of the Official Stickforge mod pre installed on the server) then press enter.
Now the server should start. If it asks you for network permission, accept all then wait a bit until it launches.
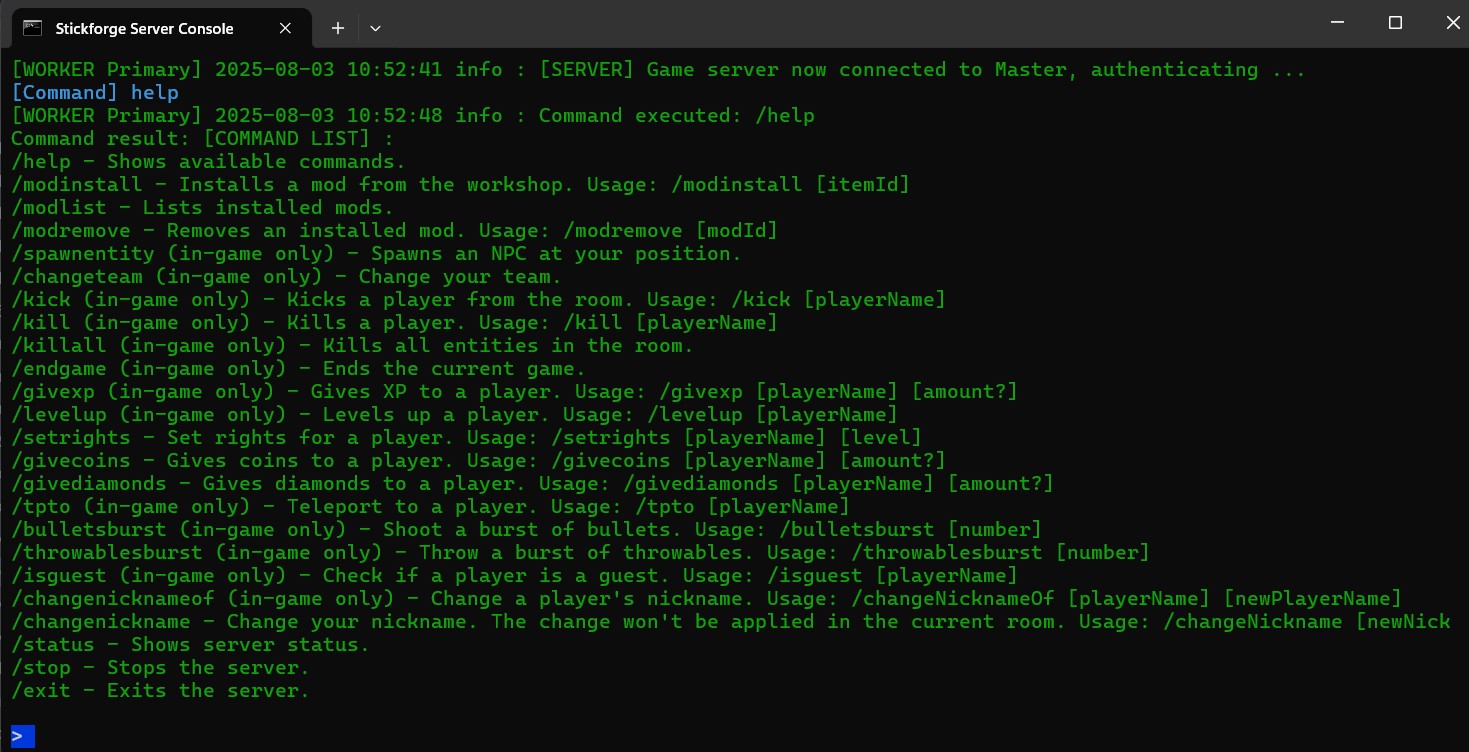
If there is no error written in red, then the server is running. To verify you can write in the terminal helpthen press enter.
If it displays a list of command, it is working well.
Now, don't close the terminal and return to Steam.
¶ Test the the local server
Click on Stickforge in your Steam Library and launch the game.
On the game menu, click on Play Online (first button). Then when the servers list appear, click on Join IP (green button at the top right corner).
Then now you can connect to your local server by clicking on Join Localhost (Port 7337).
NOTE: If you know what you are doing, and you want to connect to another server by its IP you can use the Server Address field above. Otherwise ignore that.
If everything works well, after a few seconds you should be connected to your server and able to join a game!
Congratulations, your Stickforge local server is ready for modding! You can close the game for now.
Now let's access the servers file so that you can modify an existing mod or create a new one.
¶ Accessing mods directory
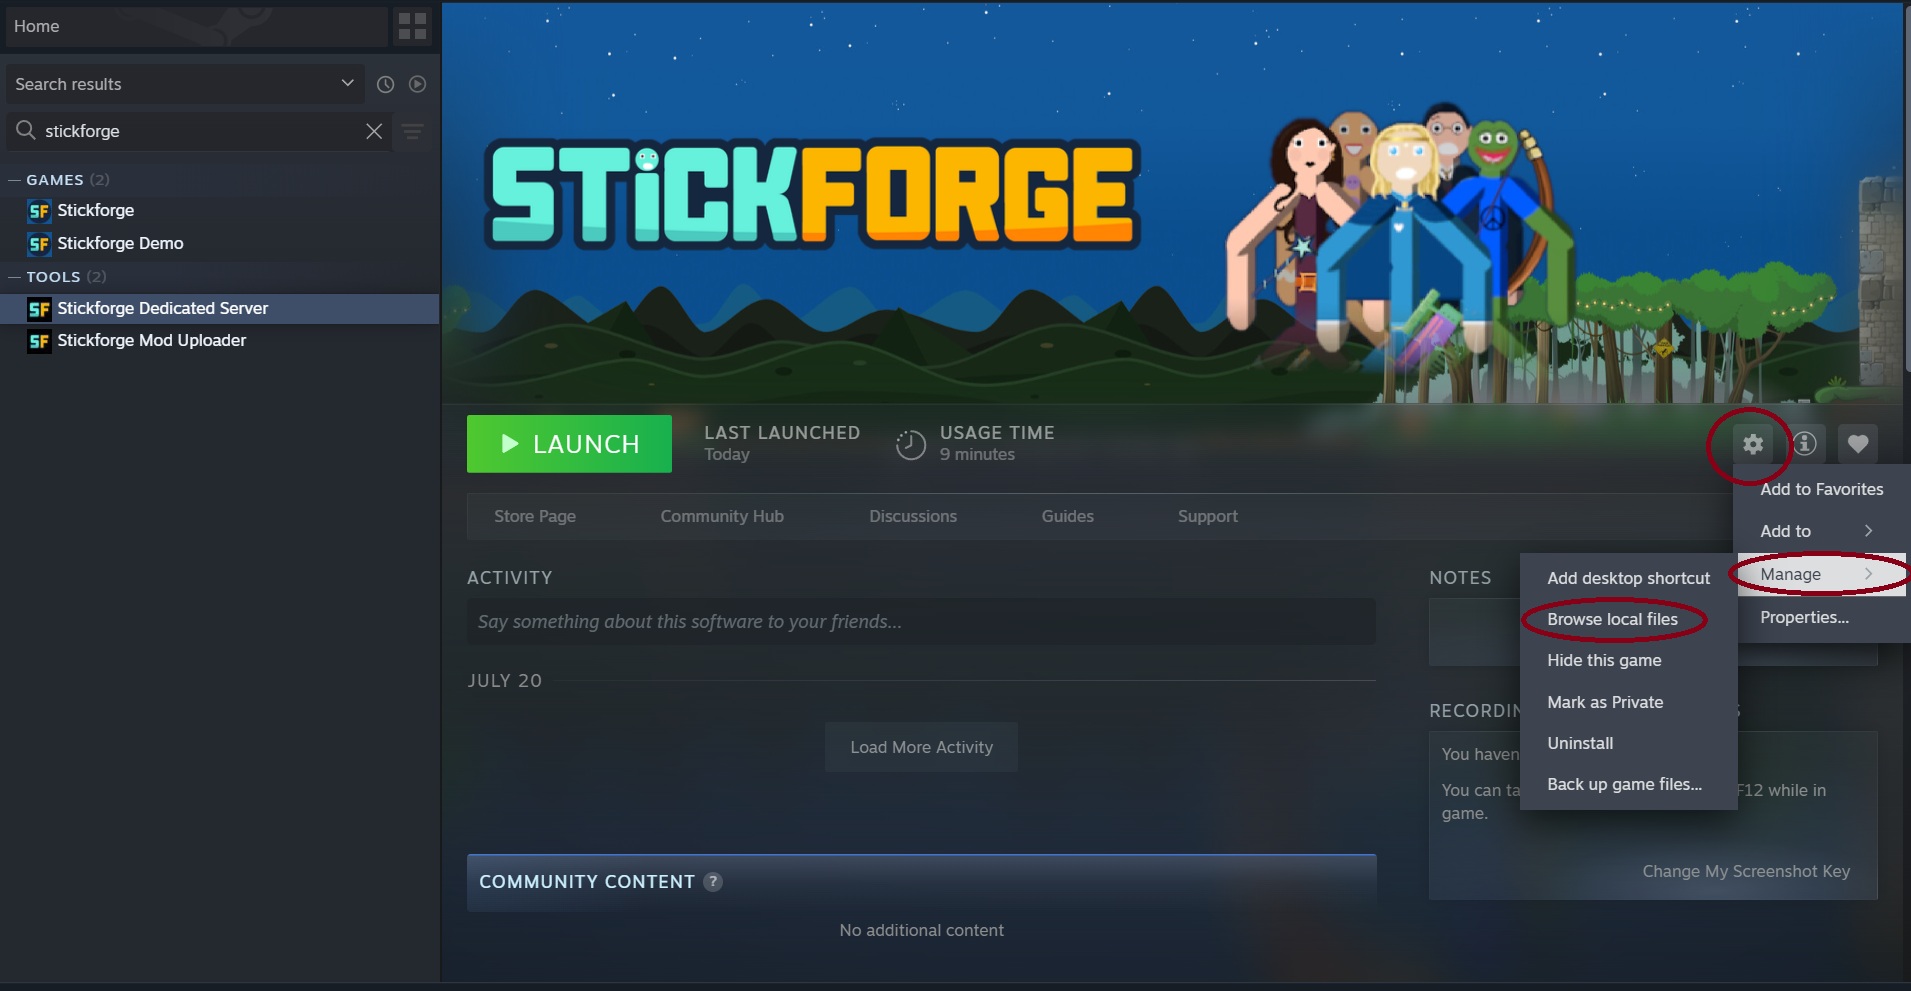
All the mods are stored in a directory on the game server. To access this directory on your computer you need to open Steam again and in your Library select Stickforge Dedicated Server again. Don't stop/launch it since it's already running. Click on the gear icon on the right and select Manage > Browse local files
Now it's becoming very interesting! This is when your modding adventure really starts.
A file explorer window should have popped up. Click on View → Show → Hidden items. This may defer depending on your operating system, but the goal here is to display hidden files.
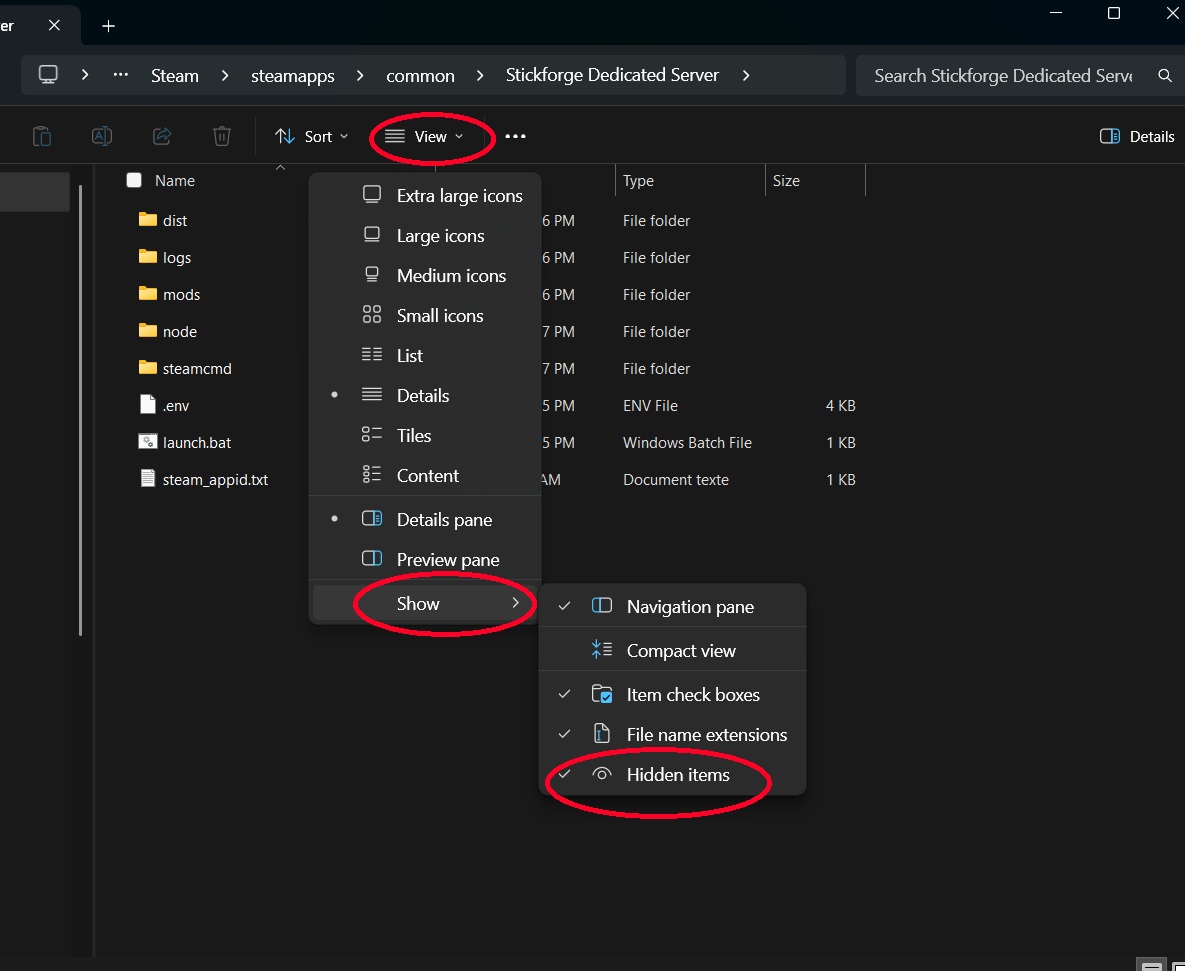
Once you do that you should have a .env file that appears. This is the main configuration file of your server. In it you can modify your server name, manage gamemodes and so on.
I recommended to backup the original file in case of a problem before doing any modifications. More information about the .env file here.
We are mostly interested by the mods directory. Navigate to it and inside you should see “sf_base” which is the stickforge official base mod that contains all the assets of BattleStick (previous game before Stickforge). You can now navigate to sf_base. This is where you can modify the stats of items, skins of stickman and so on.
Depending on what you want to create, check the appropriate modding section on the Wiki. You can also create a new mod. In that case, follow the my first Stickforge mod tutorial.
Keep that mods directory in mind for modding. Have fun :D
IMPORTANT: The Stickforge Official Base mod is under strict usage license, you don't have the right to distribute the files outside of the game context (the server directory or the Steam Workshop). Check LICENSE.txt in the mod directory for more detail.