¶ Stickforge Modding Guide: Items
This section covers how to create custom items. Items in Stickforge are highly versatile and can be configured as player weapons, throwable utilities, or even items used exclusively by NPCs.
¶ Getting Started: Learning from Examples
IMPORTANT: The best way to learn is by exploring existing items. I recommend you check out the items in the sf_base mod that comes with the game server. You can try them out in-game to see how they behave, and then look at their corresponding data.json files to understand how they were built. I'm the sole developer of Stickforge, so I may have made mistakes in this documentation. If any information is missing, please refer directly to the files from the item that inspires you and let me know on Discord (nickname Ultdx).
To get you started, here is a download link for the Magic wand from the sf_base mod. This will give you a clear idea of the files expected for a basic weapon. Then you can also copy paste an item from sf_base into your own mod and tune it (check the sf_base/LICENSE.txt file to stay compliant with the usage of the mod).
There is no tool to visualize items directly yet. To test your creation, you will need to restart your game server, connect to it, and check how the item looks and behaves in the armoury and in-game. When you make changes to your item's files, it is very important to also increase the version number in your item's data.json file. This tells the game to load the new changes. You can then restart the server again and repeat the process until you are pleased with the result.
¶ Item Categories
The core of an item's function is defined by its category property in data.json. This determines who can use the item and how it is activated.
- Primary Items (
"category": "weapons"): These are the main weapons for players, activated with a Left Click. They can be melee, ranged, or support items. - Secondary Items (
"category": "throwables"): These are utility items for players, such as grenades, shields, or deployable traps. They are activated with a Right Click. - NPC-Only Items (
"category": "npc_item"): These items cannot be equipped by players and are used exclusively by NPCs (Non-Player Characters). They should also have"visible": falseto hide them from the in-game armoury.
¶ Directory Structure
Each item must be in its own folder inside your mod's items/ directory.
Example: Let's look at the real file structure for the Magic Wand item. Notice how the filenames for the images and sounds use the item's name as a prefix.
my_mod/items/
└── magic_wand/
    ├── data.json
    ├── magic_wand_model.png
    ├── magic_wand_overview.png
    ├── magic_wand_bullet.png
    ├── magic_wand_shoot.ogg
    ├── magic_wand_hit.ogg
    ├── magic_wand_destroy.ogg
└── effect_magic_wand_hit_particles.json¶ The data.json File: Your Item's Blueprint
Every item folder must contain a data.json file. This file acts as the blueprint for your item, telling the game everything it needs to know, from its name and description to how it behaves in combat. The following sections break down the key properties you can set within this file.
¶ Core Properties
These properties are fundamental to any item's definition.
| Property | Type | Description |
|---|---|---|
_id |
string |
The id of your item, it must be unique! Use an ObjectId generator to generate a new one : https://nddapp.com/object-id-generator.html click on generate. Then copy past the id in jour JSON. Example : “_id” : “6864db3461a1571f3f01508e” |
name |
object |
The name of your item as it will appear in the game. You can provide names for different languages (e.g., {"en": "My Item", "fr": "Mon Objet"}). |
description |
object |
The item's description, which also supports multiple languages. |
model |
string |
The base model identifier. The game uses this to find the default asset files (e.g., if the model is "magic_wand", the game looks for magic_wand_model.png). |
models |
array[] |
This is your model skins, it's required and you need to have at least one model (the default one). Check the section below “Model Skins” for more details. For example: Firework Launcher is a model skin for the Stickiller. |
category |
string |
Determines the item's core function: "weapons", "throwables", or "npc_item". |
type |
string |
Specific item type. Examples: "ranged", "melee", "shields", "bombs-grenades", "traps", "totems","banners","hats","masks","eyewear","special-abilities" used mainly by the server's shop to display items in the right category, |
visible |
boolean |
Set to false to hide the item from the armoury (essential for npc_item). |
author |
string |
This is the name of the author of this item, it's displayed in the server's armoury (shop) |
¶ The stats Object
Inside your data.json, the stats object holds the key numbers that define your item's performance.
| Property | Type | Description |
|---|---|---|
hitbox |
number |
Hitbox in pixel. Melee weapon has typically a higher hitbox, like 40. while ranged weapons are between 15 and 20. |
cooldown |
number |
Time in milliseconds before the item can be used again. |
damage |
number |
Base damage. Negative values heal. Complex behaviors (like healing allies but damaging enemies) are handled via the effects array. |
speed |
number |
Velocity of the projectile. |
range |
number |
Maximum distance the projectile can travel. For melee weapon it's great to set a short distance like 80 or so. It's always great to set a value of 3000 or more for ranged weapons. It allows the projectile to be destroyed if it goes out of the map. Value in pixel. |
aoe |
number |
Area-of-effect radius of the projectile's impact. |
canTeleport |
boolean |
If true, using this item teleports the player to the projectile's location. |
keepVelocityWhenTeleport |
boolean |
If true, the player retains their momentum after teleporting. |
pushRadius |
number |
Push force applied to the target when hit |
extraHp |
number |
Provide extra HP when equipped |
extraArmor |
number |
Provide damage decrease bonus when equipped (1 armor decreases 1 damage, minimum damage taken is 1) |
targets |
array[string] |
The targets for this weapon, if it can hits enemy or ally, etc
|
¶ Projectile & Combat Properties
These properties, also set at the top level of your data.json, define specific combat behaviors.
| Property | Type | Description |
|---|---|---|
nbBullets |
number |
Number of projectiles per shot |
nbBursts |
number |
Number of bursts to fire. |
delayBetweenBurst |
number |
Delay in milliseconds between bursts. |
gravity |
boolean |
If true, the projectile is affected by gravity. |
pierce |
boolean |
If true, the projectile passes through targets instead of being destroyed on impact. |
canDestroyTrapsAndBeacon |
boolean |
If true, this item's projectile will destroy enemy deployables like mines and teleport beacons. |
displayBoomComicBubbleOnHit |
boolean |
If true, displays a "BOOM!" bubble on impact. |
hasCustomBulletImage |
boolean |
Set to true if you are providing a custom {model}_bullet.png file. |
hasTrailParticles |
boolean |
Set to true on an item model to enable a particle trail effect. |
unlimitedMineDetectionRange |
boolean |
Set to true to allow the player to detect the mine of enemies with unlimited range (used by the official item third_eye) |
unlimitedFakeDeathDetectionRange |
boolean |
Set to true to allow the player to still see enemies life and nickname when they are feigning death. (used by the official item third_eye) |
¶ Model Skins
It's possible to add model skins to an item, that allow you to customize its appearance and eventually create new purchasable content for the players on your server.
For doing that, you need to add new elements in the models property in your data.json.
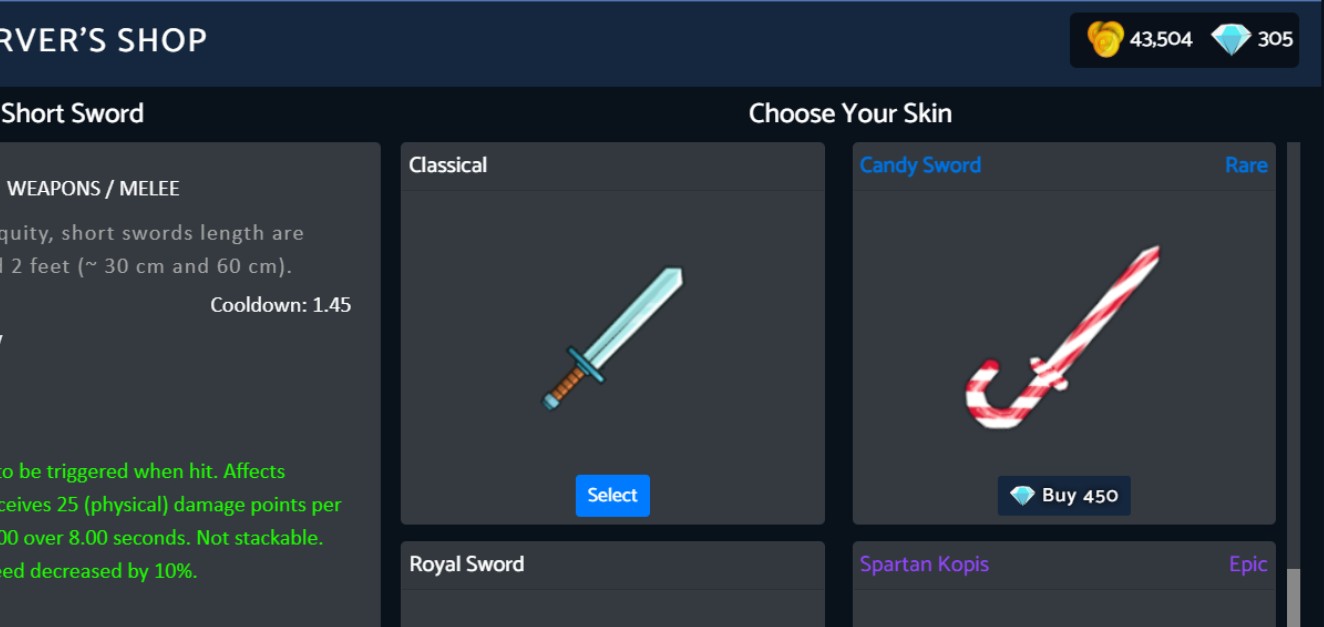
Let's take the short_sword item as an example from the Stickforge Official Mod and open its data.json file.
You will notice the following :
"models": [
        {
            "model": "short_sword",
            "name": {
                "fr": "Classique",
                "en": "Classical"
            },
            "default": true,
            "coinsRequired": 0,
            "noBulletOrInvisibleWhileCooldown": true,
            "physics": {
                "attachment": {
                    "x": 0,
                    "y": 50
                }
            }
        },
        {
            "model": "short_sword_royal",
            "name": {
                "fr": "Epee Royale",
                "en": "Royal Sword"
            },
            "diamondsRequired": 200,
            "noBulletOrInvisibleWhileCooldown": true,
            "physics": {
                "attachment": {
                    "x": 0,
                    "y": 50
                }
            }
        },
        {
            "model": "short_sword_diamond",
            "name": {
                "fr": "Epee de Diamant",
                "en": "Diamond Sword"
            },
            "diamondsRequired": 450,
            "rarity": "rare",
            "noBulletOrInvisibleWhileCooldown": true,
            "physics": {
                "attachment": {
                    "x": 0,
                    "y": 55
                }
            }
        },
        {
            "model": "short_sword_candy",
            "name": {
                "fr": "Epee Bonbon",
                "en": "Candy Sword"
            },
            "description": {
                "en": "The sweetest sword ever made - it tastes like sugar, but on the enemy's flesh!",
                "fr": ""
            },
            "diamondsRequired": 450,
            "rarity": "rare",
            "new": false,
            "available": true,
            "event": "Christmas",
            "eventEndDate": null,
            "eventStartDate": null,
            "noBulletOrInvisibleWhileCooldown": true,
            "physics": {
                "attachment": {
                    "x": 10,
                    "y": 55
                }
            }
        },
        {
            "model": "short_sword_spartan_kopis",
            "name": {
                "fr": "Kopis Spartiate",
                "en": "Spartan Kopis"
            },
            "description": {
                "en": "The Ancient Greeks and the Spartans often used this single-edged blades in warfare.",
                "fr": ""
            },
            "diamondsRequired": 880,
            "rarity": "epic",
            "new": false,
            "available": true,
            "noBulletOrInvisibleWhileCooldown": true,
            "physics": {
                "attachment": {
                    "x": 0,
                    "y": 60
                }
            }
        }
],This is the models array, with all the data about the models of the short_word. Each skin has its own model for example short_sword_spartan_kopis. So you will have to design the model image and set the file name according to the model (don't forget the _model suffix. Then also creates the other assets as follow and name them after your model too with the appropriate suffix.

¶ Properties for the model skins
| Property | Type | Description |
|---|---|---|
model |
string |
This is the model string that the game will be using to load the assets from the server. In that case based on the example above it should be short_sword_spartan_kopis. |
name |
object |
The name of your item skin as it will appear in the game. You can provide names for different languages (e.g., {"en": "My Item Skin", "fr": "Mon Skin"}). |
description |
object |
The item's description, which also supports multiple languages. |
default |
boolean |
Your item must have at least ONE model, which is the default model. For the default model, it must be true. For other models, you don't have to give the property, otherwise you can write falseif you want. |
diamondsRequired |
number |
The amount of diamonds required to buy the item |
coinsRequired |
number |
The amount of coins required to buy the item |
levelRequired |
number |
The level needed to be able to buy / equip this item (if it's free) |
angularVelocity |
number |
This value is used to make the projectile rotates when launched. For example the boomerang, or the throwing knives. A reasonable value could be 20. |
rarity |
string |
Item's rarity, only for display purpose (can be common, uncommon, rare, epic, legendary) |
new |
boolean |
trueor false value. Will display a small ribbon in the armoury |
hasTrailParticles |
boolean |
true if trailing particles are available else false. A good example in the javelin_assagai item in Stickforge official mod, model skin golden javelin where a trailing particles file is available, same for the Stickiller with the model skin fireworks launcher. |
displayBoomComicBubbleOnHit |
boolean |
Should display a "BOOM" comic bubble when exploding? true or false |
explosionSprite |
string / boolean |
Value can be “particles” if a particle file is given. Example stickiller. true if an explosion image exists (example brigida)false for other cases |
available |
boolean |
true if you want your item to be displayed in the armoury when your server is in production mode. Otherwise false. If your server is launched in development mode, it will be always displayed. |
noBulletOrInvisibleWhileCooldown |
boolean |
true if you don't want your item to be invisible when the cooldown is reloading. That's the case for the throwing axe or the boomerang in the Stickforge Official Mod for example. You also want it to be true when you are using a melee item, instead it won't display any bullet. Otherwise, false for other weapons like bow. |
physics |
object |
This is the attachment object, check example above to see its structure. It's used to put the item in the stickman's hand (could be player or NPC stickman). You can take inspiration from the existing item as long as the item model image size is the same. Otherwise, try with an arbitrary value for |
| events data | Check example above |
¶ Advanced Functionality
¶ Applying Status Effects
Many items do more than just deal damage; they can apply status effects like poison, bleeding, or healing. This is done by adding an effects array to your item's data.json. Each object in this array defines a rule for applying a specific effect.
How it works: The effects array links your item to a separate Effect file. When the item's trigger condition is met (e.g., it hits an enemy), it has a chance to apply the linked effect to the target. For example, the Blowpipe has a 100% chance to apply a poison effect on hit.
Advanced Example (Brigida): You can create complex support items by adding multiple entries to the effects array. The Brigida staff, for instance, has separate effect entries for when it hits an "ally" versus an "enemy". This allows it to heal teammates and damage foes with the same projectile. You can even stack multiple effects on the same target type.
| Property | Type | Description |
|---|---|---|
effect |
string |
The ID of the effect to apply. This ID comes from the effect's own data.json file. |
triggerOn |
string[] |
When to attempt applying the effect. Common values are "hurt" (when the projectile hits a target) and "explode" (when the projectile is destroyed). |
chance |
number |
The probability (from 0 to 1) that the effect will be applied when triggered. 1 means 100% chance. |
targets |
string[] |
Who the effect can be applied to. Can be "enemy", "ally", or "local" (the player who used the item). |
maxTargets |
number |
The maximum number of targets the effect can be applied to with a single use. |
aoe |
number |
Defines a specific area-of-effect for the effect itself, which can be different from the item's main AOE. |
affectFullHealthPlayer |
boolean |
If false, the effect will not be applied to targets that have full health. Useful for healing effects. |
¶ Spawning NPCs
Some items, like totems or the gravitational bomb, don't apply effects directly. Instead, they can be configured to spawn an NPC to do the work. This is achieved with the spawnNpcs array inside your data.json.
How it Works: A player uses an item (e.g., Gravitational Bomb), which has a spawnNpcs property. This tells the game to create a specific NPC (e.g., a "black hole" NPC) at the impact location. That NPC then uses its own invisible npc_item to apply the actual physics or healing effects to nearby players.
    "spawnNpcs": [
        {
            "npc": "600f14aa5d9cb210e75e8122",
            "maxInstances": 1,
            "chance": 1,
            "triggerOn": [
                "cast"
            ]
        }
]The example above is used for the totem_fireitem.
¶ Consumables
For secondary items with limited uses (like a stack of bombs), use the consumable object in your data.json.
| Property | Type | Description |
|---|---|---|
quantityPerStack |
number |
The number of items received in a single purchase. |
coinsPerStackRequired / diamondsPerStackRequired |
number |
The cost to repurchase one stack. |